
Content calendars are one of the most valuable tools in your content marketing toolbox. They help you stay organized, get content out on time, and avoid repeat posts.
The beauty of content calendars is that you can make them in almost any program. My favorite is Google Sheets, but a close second is Notion, a free productivity software.
Today, I’m going to show you how to create a simple content calendar using Notion. If you haven’t heard of or used it before, check out their beginner’s guide before diving into this tutorial. But if you already know what you’re doing, let’s get started.
Why Notion?
If I prefer Google Sheets, why do I use Notion? Mainly because they’re different programs with different capabilities. A few great things about using Notion are:
All-In-One Software
Google Sheets is a spreadsheet, and that’s it. Notion allows me to organize in-depth. I can track my content while creating to-do lists, goals, calendars, and more. It’s my favorite online organization tool for that reason.
Multiple Views
When I create a spreadsheet in Notion, it’s not a static item. I can link the various items to pages inside the software. I can also create multiple views, seeing my spreadsheet as a calendar or a table. This is super helpful for different ways of seeing your content.
Customization
Lastly, I love all the customization options Notion offers. I’m the kind of person who loves a pretty workspace, and Notion lets me create that. I can change fonts and colors, add images, and rearrange columns to create the exact space I want.
Creating a Content Calendar in Notion
All right, let’s get into the fun stuff. Creating your content calendar so you can stay organized at work.
Create a Database
A database is what Notion calls a collection of pages. There are multiple types, but we’re going to focus on the table and calendar views in this tutorial.
Add a Page
1: Click the “add a page” button.

2: If you want to nest it under another page, drag and drop it to the correct spot.

3: Type in a simple title, such as “blog name+content calendar”.

Add a Database
1: Click the “empty page” button to start with a blank slate.

2: Type in “/table view” and click on the database that appears.

3: Click “Select a data source”.
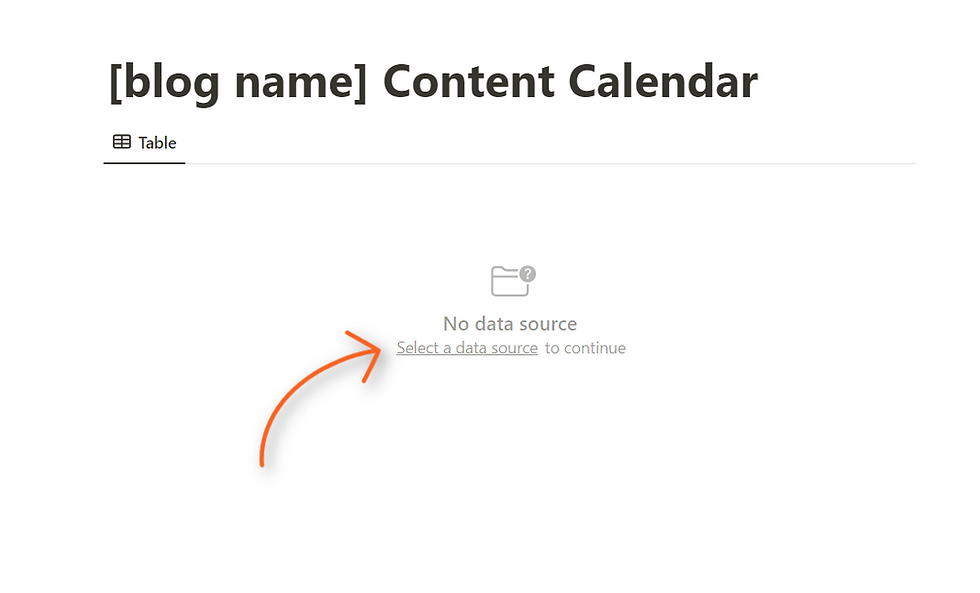
4: A menu will appear. Select the “new database” option.

Congrats! You’ve now created the base of your content calendar!
Set Up Database
Next, we need to get your table database all set up. This is the step where you’ll see your content calendar come together.
0.5: Give your database a title. It’s not strictly necessary, but I hate looking at the “untitled” label.
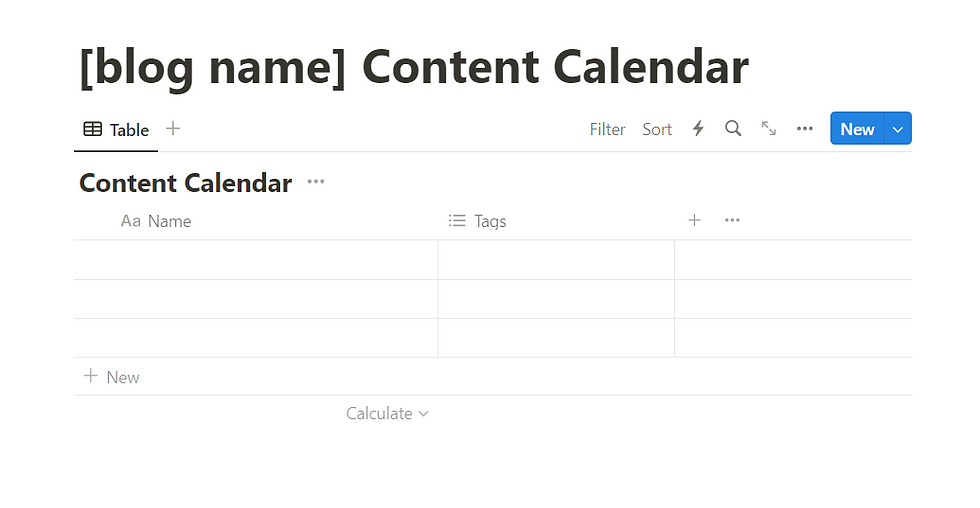
1: Click the + button to add more properties to your database. My favorites are text, multi-select, and date, but experiment to find what works for you.
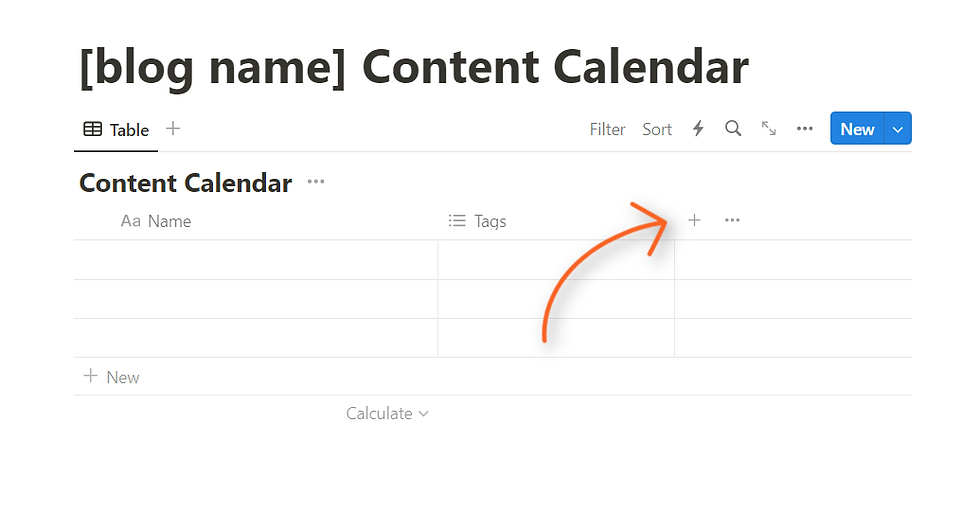
2: Relabel your properties by clicking on the name. It’ll open a menu with various options, including the title.

3: Add the title you want, such as “post” or “publish date”. If you need ideas of what to include, check out this post.

Add Multiple Views
As I said, one of the best parts of Notion is how you can create more than one way to view information. Even better, it's super easy.
1: Click the + button next to the word “table”. It’ll automatically open a new view.

2: Select “calendar” from the list.


3: If you want to add more views, such as a list or gallery, repeat the first two steps.
The information you put on one view will automatically transfer to the others, so you never have to worry about doing it yourself.
Using Your Content Calendar
With your databases all set up, it’s ready to use. Here are a few final tips for doing that.
Fill in Information
1: On the table view, add your content calendar information.

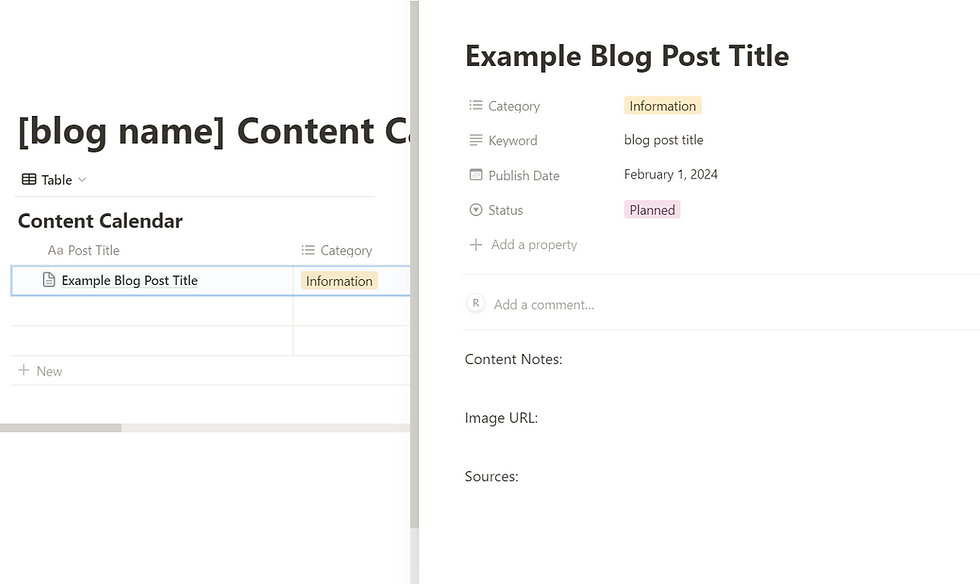
2: The first property on your database automatically creates a page. Click on the “open” button to open the page on the side of your screen.

3: Fill the page with whatever you want. This is the perfect place for content sources, notes, or post text.
Finishing Touches
1: Change the font by clicking the three dots in the upper corner. You have three options to pick from (with my favorite being serif).

2: Click the “add icon” button above the text. It’ll add an emoji for you.

3: To change it, click the emoji and pick a relevant one.

4: Click “add cover”. Once again, it’ll fill one in for you.
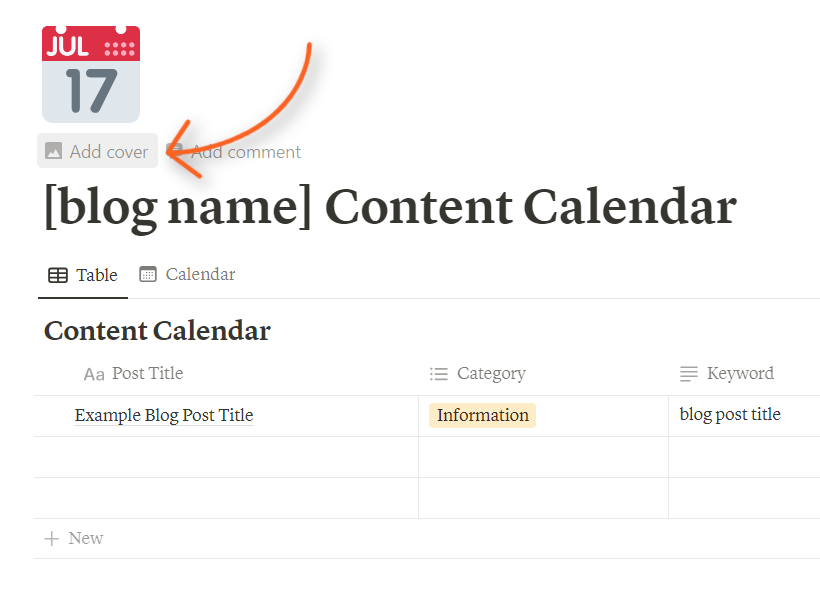
5: To change it, click “change cover” and choose from the options they give you. Or upload your own image.

You now have a beautiful content calendar to use alongside your favorite Notion features. But if you got to this point and feel intimidated about doing this yourself, I got you. Click the image below to get my content calendar template for your Notion database.
Still aren’t sure about figuring this out yourself? Do you wonder if there’s someone who can help you create a content calendar and maybe write content for your blog while they’re at it?
I’d love to help! I write content for small businesses to help them build online authority and connect with more potential customers. To learn more, click the button below.

Comments